Showing posts with label action. Show all posts
Showing posts with label action. Show all posts
Sunday, February 15, 2015


Monday, February 2, 2015
Upgrading Tools Tutorial for Action Chip Android Tablet Pc
Firmware Upgrade Tool for
ACTION CHIPSET
(ATM7021+ATM7029+ATM7039)
, CPU,BOXCHIP,MAIN CHIP for Android Tablet PC
Read Article about Actions_Semiconductor
Before flashing,upgrading tablet pc must match your Tablet PC firmware and download the complete (.img) file which will use to flash your android tablet with the help of Action tablet flashing tool.
Here is complete tutorial to flash Action Chip based Android Tablets .
Download Flashing Tool for ACTION CHIPSET
Action Tablet Product Tool 1.02-02(Developer Edition)

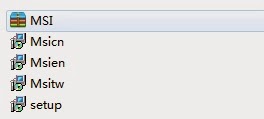
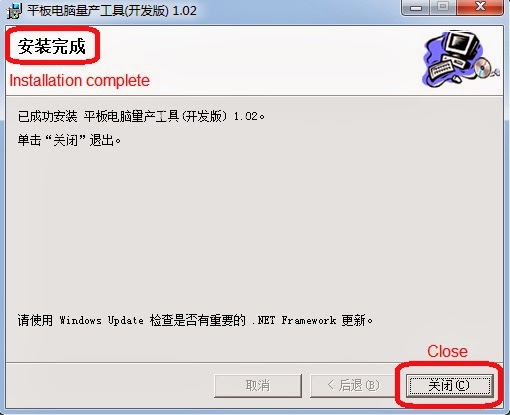
Extract and Run MSI file
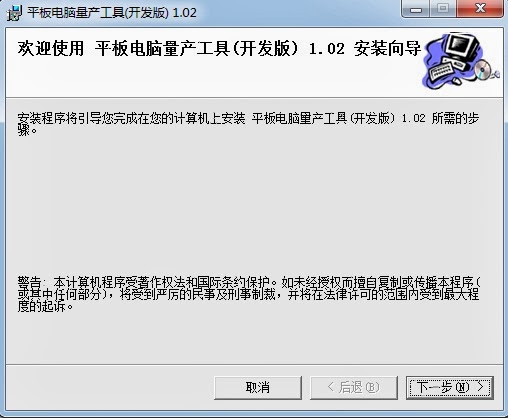
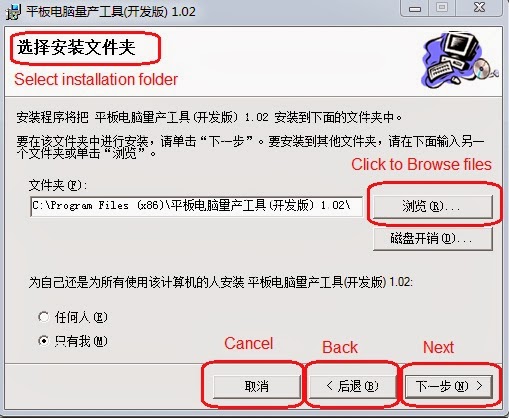
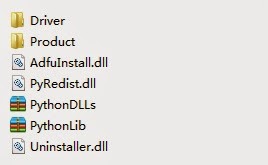

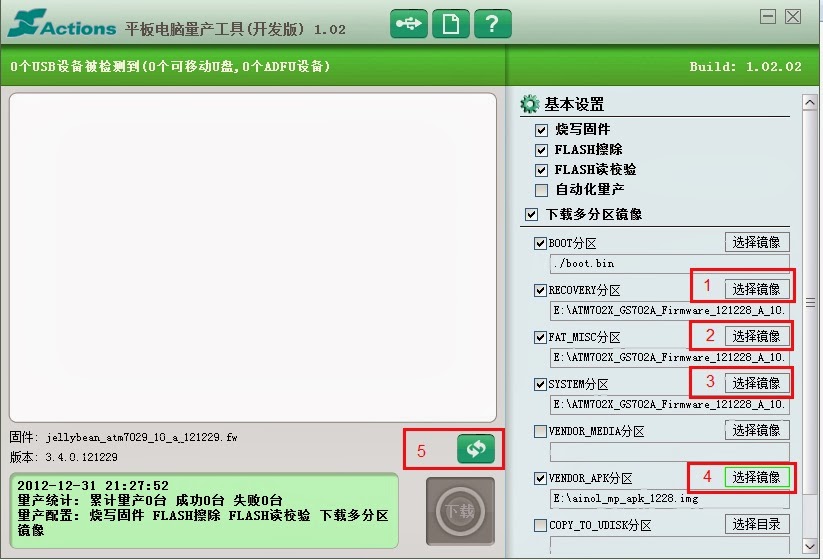
After Opening MainApp you will have the complete view of Action Tablet tool . Please read carefully and follow the following steps to replace the files with the matched one.
marked 1 to 5 in the picture in red box to make the following comments .
Click to select the "Recovery" file in the firmware folder
Click to select the "Fat_Misc" file in the firmware folder
Click to select the "System" file in the firmware folder
Click to select the "apk.img" file in the firmware folder
Click to select a file whose suffix name is "FW" in the firmware folder.
Turn off your Android Tablet . Hold down Volume (+ UP) button for few seconds and insert usb cable in Tablet . Computer will inform you "usb device found " .
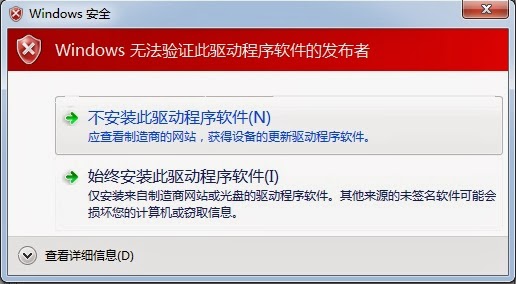
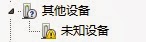
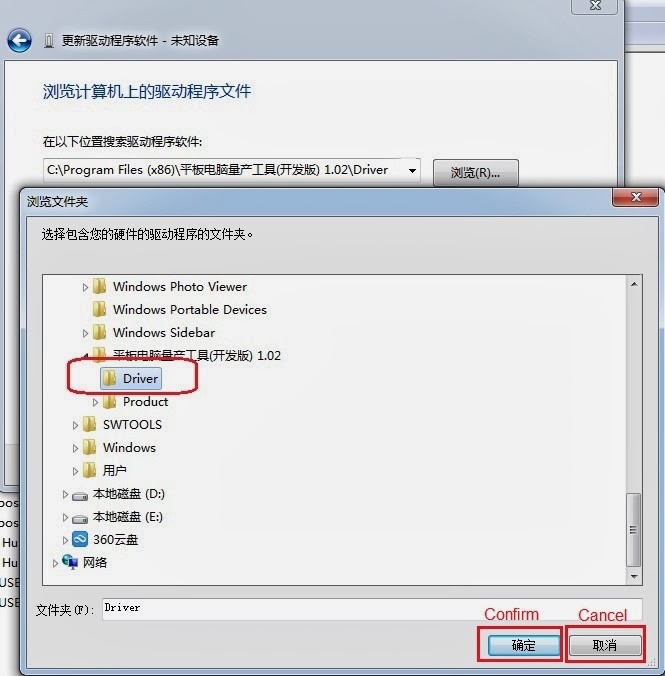
Manually install drivers by opening ---->Right click on my computer---->Properties--->Unknown device.
Right click on unknown device and install drivers.
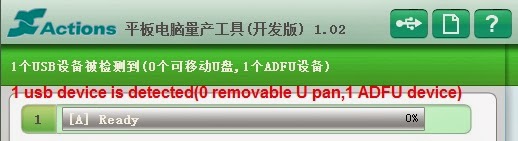
When you see the above software condition on your computer you are ready to upload tablet firmware.
Now click on download to upgrade .
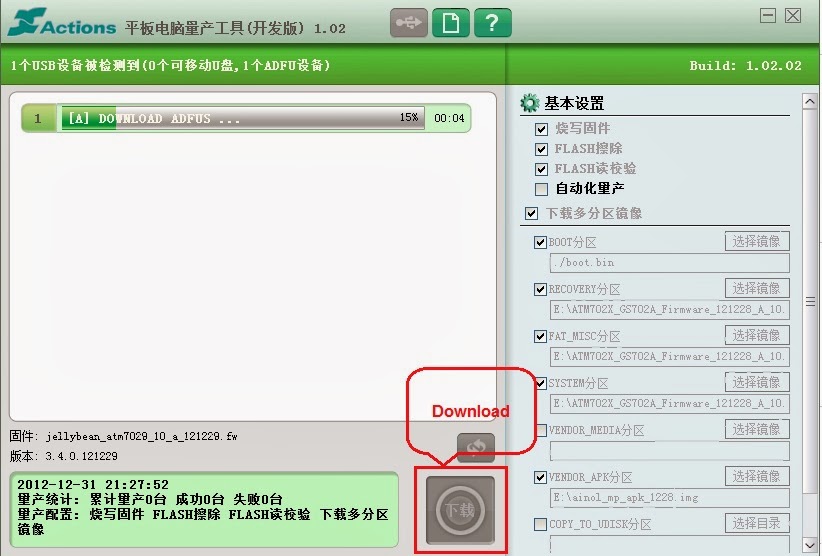
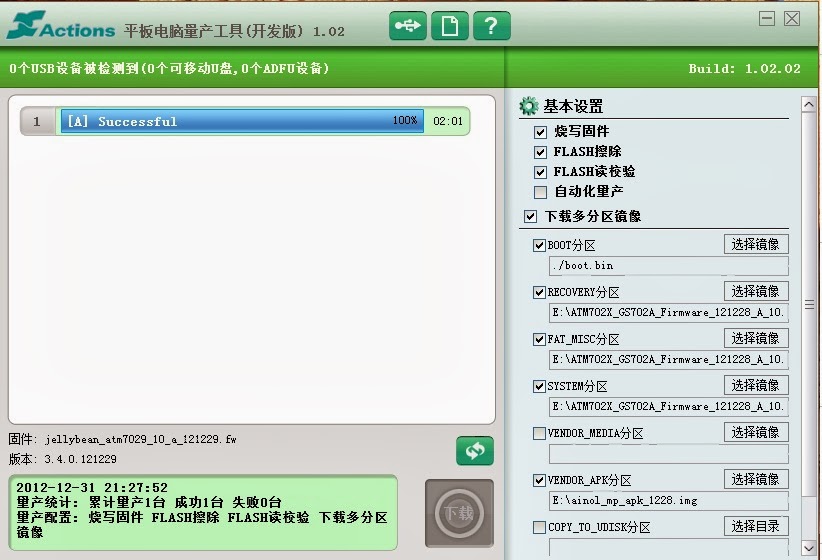
Things to Remember before flashing Android Tablet.
Charge Tablet PC battery more than 60%. Power failure during installing / upgrading android tablet may result in dead tablet.
Upgrade process take some time depend on device . Do not panic just sit relax.
Related Posts.
Upgrading Tablet Android firmware with Micro SD Card Tutorial.
How to Unbrick your Bricked Android Tablets
How to Recognize Tablet Official Firmware or Generic Rom or Board ID
LIVESUIT FLASHING TOOLS & TUTORIALS
Allwinner A10 A13 Tablet Touch Fixer by UnitedGSM.
Allwinner A10/A13 Tablet firmware backup script/tool
How to Install CyanogenMod on HP Touchpad step by step Guide and Tutorial.
Saturday, January 31, 2015
Android beginner tutorial Part 50 Options menu icons Action bar
In this tutorial we will learn how to add icons and use Action bar.
As I mentioned before, an Action bar is something Google invented and plants to replace the old Options menu with. Still the menu remains as long as there is a Menu button on the device. In this part I will show you how to add icons to menu items that are displayed in the old Icon Menu that appears in the bottom of the screen, or in the Action Bar on devices running newer versions of Android. The icons are not displayed in the List-like menu though.
The MainActivity.java class remains like this the whole time today:
We will be working in activity_main.xml, which is located in res/menu/ directory.
Add 3 items here, give them unique ids and titles. Set their icons using the "icon" attribute. Im using the two snowflake pictures I have in my drawable-hdpi folder. Icons can also be added with code using setIcon() method, but right now Im doing it using XML.
The showAsAction attribute can be set to multiple values and to some combination of the available values. The values are "never", "ifRoom", "withText", "always", "collaspeActionView". You can use more than one of the keyboards like this: "ifRoom|withText".
The "ifRoom" keyboard indicates that the button will be displayed only if theres space available. The "withText" keyboard tells android to display the text of the button if available (if there is room for that). The "collapseActionView" keyword adds a button that displays a drop-down menu with all the rest of the buttons that are not displayed.
Lets add "withText" to all 3 buttons, "always" to the first button and "ifRoom" to the second and third one.
On an Android device I have that runs Android 2.3, all the icons are displayed in the classic Options menu in the bottom part of the screen.
This is how the application looks on Android 4 phone:

And this is the same application on a tablet:

As you can see, the phone could only fit 2 icons without text, while the tablet is wide enough to display all 3 icon with their text labels.
Lets try putting "collapseActionView" for the second and third items:
The tablet now displays a button like this, which spawns a dropdown menu when it is touched:
 IMG HERE
The phone, however, does not display such a thing. But the dropdown menu can be called out by pressing the Menu item on the device.
This way, we made sure all the buttons are displayed on all devices, even though in different ways.
Thanks for reading!
Read more »
As I mentioned before, an Action bar is something Google invented and plants to replace the old Options menu with. Still the menu remains as long as there is a Menu button on the device. In this part I will show you how to add icons to menu items that are displayed in the old Icon Menu that appears in the bottom of the screen, or in the Action Bar on devices running newer versions of Android. The icons are not displayed in the List-like menu though.
The MainActivity.java class remains like this the whole time today:
package com.kircode.codeforfood_test;

import android.app.Activity;
import android.os.Bundle;
import android.view.Menu;

public class MainActivity extends Activity{

@Override
protected void onCreate(Bundle savedInstanceState) {
super.onCreate(savedInstanceState);
setContentView(R.layout.activity_main);
}

@Override
public boolean onCreateOptionsMenu(Menu menu) {
// Inflate the menu; this adds items to the action bar if it is present.
getMenuInflater().inflate(R.menu.activity_main, menu);
return true;
}

}
We will be working in activity_main.xml, which is located in res/menu/ directory.
Add 3 items here, give them unique ids and titles. Set their icons using the "icon" attribute. Im using the two snowflake pictures I have in my drawable-hdpi folder. Icons can also be added with code using setIcon() method, but right now Im doing it using XML.
The showAsAction attribute can be set to multiple values and to some combination of the available values. The values are "never", "ifRoom", "withText", "always", "collaspeActionView". You can use more than one of the keyboards like this: "ifRoom|withText".
The "ifRoom" keyboard indicates that the button will be displayed only if theres space available. The "withText" keyboard tells android to display the text of the button if available (if there is room for that). The "collapseActionView" keyword adds a button that displays a drop-down menu with all the rest of the buttons that are not displayed.
Lets add "withText" to all 3 buttons, "always" to the first button and "ifRoom" to the second and third one.
<menu xmlns:android="http://schemas.android.com/apk/res/android" >

    <item
        android:id="@+id/menu_one"
        android:orderInCategory="1"
        android:showAsAction="always|withText"
        android:icon="@drawable/snowflake"
        android:title="Button one"/>

    <item
        android:id="@+id/menu_two"
        android:orderInCategory="2"
        android:showAsAction="ifRoom|withText"
        android:icon="@drawable/snowflake2"
        android:title="Button two"/>

    <item
        android:id="@+id/menu_three"
        android:orderInCategory="3"
        android:showAsAction="ifRoom|withText"
        android:icon="@drawable/snowflake"
        android:title="Button three"/>

</menu>
On an Android device I have that runs Android 2.3, all the icons are displayed in the classic Options menu in the bottom part of the screen.
This is how the application looks on Android 4 phone:
And this is the same application on a tablet:
As you can see, the phone could only fit 2 icons without text, while the tablet is wide enough to display all 3 icon with their text labels.
Lets try putting "collapseActionView" for the second and third items:
<menu xmlns:android="http://schemas.android.com/apk/res/android" >

    <item
        android:id="@+id/menu_one"
        android:orderInCategory="1"
        android:showAsAction="always|withText"
        android:icon="@drawable/snowflake"
        android:title="Button one"/>

    <item
        android:id="@+id/menu_two"
        android:orderInCategory="2"
        android:showAsAction="collapseActionView"
        android:icon="@drawable/snowflake2"
        android:title="Button two"/>

    <item
        android:id="@+id/menu_three"
        android:orderInCategory="3"
        android:showAsAction="collapseActionView"
        android:icon="@drawable/snowflake"
        android:title="Button three"/>

</menu>
The tablet now displays a button like this, which spawns a dropdown menu when it is touched:
The phone, however, does not display such a thing. But the dropdown menu can be called out by pressing the Menu item on the device.
This way, we made sure all the buttons are displayed on all devices, even though in different ways.
Thanks for reading!
Subscribe to:
Posts (Atom)