Friday, March 13, 2015
Change in Apps Scripts DocsListDialog
DocsListDialog is a widget used by only a small fraction of Apps Script projects to provide a Google Drive "file open" dialog in a UI service user interface. In almost all cases, using Google Picker in HTML service is preferable and more secure.
Before September 30, 2014, we require scripts using DocsListDialog to make a small update to improve security.
Specifically, if you use DocsListDialog, youll need to start calling a new method, setOAuthToken(oAuthToken) before you call showDocsPicker(). The new method sets an OAuth 2.0 token to use when fetching data for the dialog, on behalf of the user whose content should be shown.
So long as the app isnt a web app set to execute as "me" (the developer), you can get the necessary OAuth 2.0 token by calling ScriptApp.getOAuthToken(). The example below shows how to convert an old DocsListDialog implementation to the new model.
Old example
function showDialog() {
  var app = UiApp.createApplication();

  app.createDocsListDialog()
     .addCloseHandler(serverHandler)
     .addSelectionHandler(serverHandler)
     .showDocsPicker();

  SpreadsheetApp.getUi()
     .showModalDialog(app, );
}
New example
function showDialog() {
  var app = UiApp.createApplication();

  app.createDocsListDialog()
     .addCloseHandler(serverHandler)
     .addSelectionHandler(serverHandler)
     .setOAuthToken(ScriptApp.getOAuthToken())
     .showDocsPicker();

  SpreadsheetApp.getUi()
     .showModalDialog(app, );
}
To ensure your script continues to work properly, be sure to make this change before September 30.
Posted by Dan Lazin, Googler

Thursday, March 12, 2015
The Hottest Script in Hollywood
In just a few hours at the recent Apps Script hackathon in Los Angeles, we saw attendees build everything from website monitoring to room booking to financial tracking apps. For those of you who couldn’t make it, attendees were given a brief introduction to Apps Script and a few hours to let their imaginations run wild. Apps Script’s ease of use enabled them to quickly create fully functioning, useful apps. Here are a few interesting things we saw from local developers:
Website Monitor by Eduardo Arino de la Rubina
These days, small businesses are quickly increasing their online presence; a website outage during a critical period can be devastating to a mom-and-pop shop. Eduardo realized that existing network-monitoring solutions require a significant investment in technology and infrastructure that is beyond the reach of many small-business users. Using Apps Script’s UrlFetch and Spreadsheet services, he was able to quickly create a website monitor packaged in an easy-to-use spreadsheet that, given a list of URLs, tries to fetch each one and records the latency and content length.
The code is available here.

Get A Room by Danny Favela
Get A Room allows users to book meeting rooms by taking advantage of Apps Script’s tight integration with Google Calendar and events. The app, built entirely on a Chromebook utilizing Apps Scripts cloud friendliness, displays building floorplans with buttons that users can click to book a room. In response to a booking request, the app fetches the room’s calendar and creates a new event. It also updates the UI by replacing the floor plan with a modified image to show the newly booked room. Here is a snippet of the booking code:
// Click handler for the interaction to book a room
function bookBoardroomHandler(e) {
 var app = UiApp.getActiveApplication();

 // Perform the calendar-booking operations
 bookBoardroom();

 // Swap the images as visual confirmation
 app.remove(app.getElementById(imageDefaultLayout));
 app.add(app.getElementById(imageBoardroom));

 app.close();
 return app;
}

function bookBoardroom(e) {
 var calendarBoardroom = CalendarApp.getCalendarsByName("Boardroom");
 calendarBoardroom[0].createEventFromDescription("Boardroom Meeting");
}

Stock Info by Matt Kaufman
Matt decided to build a web service that provides information about publicly traded stocks. The app’s backend consists of a spreadsheet with stock symbols of interest. Using Apps Script’s FinanceService, Matt loops through the spreadsheet on a timed trigger and appends the latest stock information for each symbol. He then uses HtmlService to create a web app that outputs an XML page of the stock info based on a symbol parameter in the URL. Here’s a picture of his script in action:

These are just some examples of how quickly useful apps can be created with Apps Script. Thanks to all the attendees for coming out! If you couldn’t make it to the hackathon, check out these tutorials to see how you can get started making great apps.
 | Kalyan Reddy profile | Stack Overflow Kalyan is a Developer Programs Engineer on the Google Apps Script team based in NYC. He is committed to increasing developer productivity by helping them fully utilize the power of Apps Script. In his free time, he enjoys participating in the Maker community and hacking together robots. |
Tuesday, March 10, 2015
Agility in Winnipeg
In this blog, I will try to capture discussions about agile that are happening in Winnipeg and elsewhere. I hope you find it useful.
Monday, March 9, 2015
Google Apps to Snail Mail in 3 easy steps

The days of the paperless office are not yet upon us, with physical mail delivery still popular for many types of communication including marketing information, financial documents and greetings cards. Over 5000 companies in the UK now use CFH Docmail to print, stuff, and deliver their mail, resulting in over 6 million documents being sent every month. By creating Docmail Connect for Google Apps, we at UK Google focused systems integrator, Appogee, have made it simple for Google Apps users to personalize, print and mail their Google documents..
As well as allowing users to send snail mail from the Google Apps menu, we made the code library for Docmail Connect for Google Apps available in project hosting. Other Google Apps Marketplace providers, such as CRM and ERP applications, can now benefit from being able to easily integrate their applications with Docmail services.
The Challenge
In order to implement the solution we needed to take the Docmail web services and create a Python interface to them. To achieve that we needed a simple Python to Web Services layer we could rely on which would allow us to build the bridge between Google App Engine and Docmail’s API, and then we needed to make the bridge work from Google Docs to the CFH Docmail service. The final challenge we faced was achieving a seamless experience for the user which meant focusing on performance each step of the way.The Solution (in 3 easy steps)
Step 1: Invoke a SOAP Web Service from App Engine using Python
- The HttpTransport class has a u2open method which uses python’s socket module to set the timeout. This is not allowed on App Engine, and the timeout setting can be set later using App Engines urlfetch module. The timeout line was removed in a new method:
def u2open_appengine(self, u2request):
tm = self.options.timeout
url = self.u2opener()
# socket.setdefaulttimeout(tm) cant call this on app engine
if self.u2ver() < 2.6:
  return url.open(u2request)
else:
  return url.open(u2request, timeout=tm)
transport.http.HttpTransport.u2open = u2open_appengine - The SUDs library has an extensible cache class. The SUDs library provides various implementations of this, however we wanted to use the App Engine memcache for performance. To do this, we implemented a new class to use memcache, as shown below:
class MemCache(cache.Cache):
This was then plugged into the SUDs client class by overriding the __init__ method.
def __init__(self, duration=3600):
self.duration = duration
self.client = memcache.Client()
def get(self, id):
return self.client.get(str(id))
def getf(self, id):
return self.get(id)
def put(self, id, object):
self.client.set(str(id), object, self.duration)
def putf(self, id, fp):
self.put(id, fp)
def purge(self, id):
self.client.delete(str(id))
def clear(self):
self.client.flush_all() - We can now use the modified SUDs client class to make SOAP calls on App Engine! The full source code for this is available in project hosting.
Step 2: Google Docs to Docmail
CFH publish a full API to allow developers to integrate their applications with Docmail, a subset of which needed to be used by Appogee to create the interface for users to create mailings from Google Docs. Not every Docmail function is enabled in the wrapper, but the principles used can easily be extrapolated to any other function, and the key to it is getting a satisfactory link from Google Docs to Docmail.The Docmail API can accept documents in a variety of formats including doc, docx, PDF and RTF. In order to use the API, we would need to extract Google Docs content in one of these formats. The Google Docs API has support for exporting in doc, RTF and PDF. We experimented with each before settling on RTF, which, although large in file size, did work. However the Google App Engine urlfetch library has a 1MB request limit, so we were not able to send files larger than 1MB. We evaluated a number of workarounds such as cutting the files up into chunks and sending them separately, bouncing the files off another platform but our only option was to simply prevent files larger than 1 MB from being uploaded. To achieve this we used Ajax calls to check (compute) the file size in real time as they are selected and provide appropriate feedback to the user. The file size cut off is a configurable parameter, so if Google increase the limit we can adjust the app without redeploying the code.
Breaking this integration down, we used the Google Docs API together with the Docmail SOAP API, via our modified implementation of the SUDs library as described in step 1.
The Docmail API must be used in a logical order, to coincide with the wizard pages on the Docmail website. We can illustrate these steps in order:
- Create an instance of the Docmail client, which is an extension to the SUDs client class. The client contains the methods we need for further communication with the Docmail API:
docmail_client = client.Client(USERNAME, PASSWORD, SOURCE)
- Create / Retrieve a mailing. To create a new mailing, we create an instance of the Mailing class, and pass it into the create_mailing method:
mailing = client.Mailing(name=test mailing)
To retrieve an existing mailing, we need to know the mailing guid:
mailing = docmail_client.create_mailing(mailing)mailing = docmail_client.get_mailing(enter-your-mailing-guid)
- Upload a template document. Since we are retrieving documents from Google Docs to be used as the template, we need to download it first. We do this using the Google Docs API:
docs_client = gdata.docs.client.DocsClient()
We now need to extract the document. There are various formats you can do this in, but we found by experimenting that RTF worked best, despite being the largest in file size.
# authenticate client using oauth (see google docs documentation for example code)file_content = docs_client.GetFileContent(uri=doc_url + &exportFormat=rtf)
And finally upload the template file to docmail:docmail_client.add_template_file(mailing.guid, file_content)
- Upload a Mailing List Spreadsheet. This is similar code to uploading a template:
docs_client = gdata.docs.client.DocsClient()
file_content = docs_client.GetFileContent(uri=doc_url + &exportFormat=csv)
docmail_client.add_mailing_list_file(mailing.guid, file_content) - Submit the mailing for processing. The mailing needs to be submitted for processing. Once this has been done, a proof is available for download.
docmail_client.process_mailing(mailing.guid, False, True)
- Finally, we approve and pay for the mailing:
docmail_client.process_mailing(mailing.guid, True, False)
Step 3 - Performance
When creating a system like Docmail Connect for Google Apps, overall acceptability of the system will be driven as much by performance as by functionality, so we paid particular attention to the key components driving this.We were conscious that some Google Apps users may have a lot of Google documents, so presenting all of them for selection to a user wasn’t an option. Instead, we load 100 at a time (the default), and send them to the browser using XHR calls so it all happens without the user having to do anything and works quite fast - the user can now select from 1000s of documents within a few seconds.
Next we had to address the connection to the Docmail API, where care must be taken to achieve acceptable throughput. Queries to the API had to be minimized and we didnt want the page submits to be slow - the user should be able to go from one page to the next as quickly as possible. To achieve this, we used the App Engine Task Queue. When a user submits a page which requires communication with the Docmail API we fire off a Task Queue to do the work for us, and then simultaneously navigate the user to the next page in the process. This means that the server is working while the user progresses the workflow. This also means handling timeout errors is easier, as the Task Queue can catch the errors and reinstate another task. But it requires some extra planning as some tasks will not complete until others finish, and process checking needs to ensure new tasks only get fired off when the appropriate time has come.
We hope the wrapper, together with the key learnings written up here will encourage others to have a go at wiring their applications to the Docmail delivery services.
Want to weigh in on this topic? Discuss on Buzz
Tuesday, March 3, 2015
How to Recolor an Image in PowerPoint

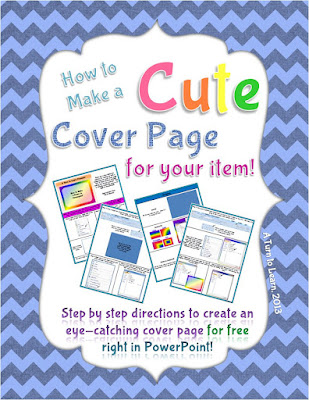
I actually wrote this tutorial months ago (back in March 2013, yikes!) for my TPT book "How to Make a Cute Cover Page for Teachers Pay Teachers." This item organizes some of my most important tutorials in a way that is easy to follow and prints perfectly on letter paper. If you like this tutorial or my other tutorials, be sure to check out this product on TPT!
Anyway, onto the poll!



For next weeks tutorial, Ill be adding "How to Create a One Page Folding Book" to the poll (just like the one below). Be sure to vote!


Monday, March 2, 2015
Seven Sensibilities of Learning in a Virtual World Dr Tony O’Driscoll
- Link to video
- Reference - Why Second Life is important to learning (Bryan Chapman)
 WHAT?
WHAT?
If you are interested in using Second Life, or other Virtual World technologies for learning purposes, Dr. Tony O’Driscolls 10-minute presentation will give you an excellent crash course discussing the “Seven Sensibilities of Learning in a Virtual World,” which are:
- The Sense of Self
- The Death of Distance
- The Power of Presence
- The Sense of Space
- The Capability to Co-Create
- The Pervasiveness of Practice
- The Enrichment of Experience
VIDEO?
Welcome to the Matrix of learning:
If you are planning to construct your own little Virtual World learning space, I suppose this is a great crash course (on the learning possibilities), or framework to get you started. Virtual worlds are certainly here to stay, but lets hope that we dont forget to spend quality time with our family, friends, colleagues, etc. in the traditional world, although it might not be that exciting. Sometimes we have no choice (e.g. distance), but sometimes we do. Think... :)
Saturday, February 28, 2015
Guidelines for Establishing Interactivity in Online Courses
Link to article (By Mark Mabrito. You need to subscribe to Innovate to view this article, but it is free)
"Establishing fruitful interaction in online courses is a persistent challenge. Mark Mabrito shares his personal practices with readers, outlining the tools and policies he has used to enhance interactivity with students, among students, and between students and course content. Mabrito explores the fine lines that instructors must walk:
- Encouraging participation without being overbearing.
- Evaluating student input without making it a dreaded requirement.
- Allowing for spontaneous reactions while promoting careful reasoning and good writing skills.
- Providing ample resources without overloading or confusing students.
For educators struggling with such issues, this article offers clear and practical strategies."
e Learning in Malaysia My New Blog
- Link to My New Blog

I just want to share with those that read this blog (or bump into it!) that I have started a new blog today (January 9th, 2008) entitled e-Learning in Malaysia. It is kind of empty right now (except for a few interesting links and posts), but as I learn over the coming months (and perhaps years), I believe it will evolve into a useful blog to find e-learning related things going on in Malaysia.
I hope this blog will eventually evolve into a good starting point to discover e-learning things going on in Malaysia (that is accessible to the public). My new learning adventure (in addition to ZaidLearn) will try to mash-up the juiciest e-learning stories going on in Malaysia (past, present, future), including:
- Higher Education (Universities & Colleges)
- Schools (Primary & Secondary)
- Corporate Learning
- Communities
- Projects
- Solution Providers
- Research Papers & Articles
- People
- Conferences
- Blogs
- Etc.
In short, the main goal for setting up this blog, is to discover, learn, share, discuss, network, and reflect about e-learning in Malaysia. Click here to read the full story behind this blog.
ZAIDLEARN?
It will continue, too (speed posting the learning juice!)!
ZaidLearn will continue to explore the world of FREE learning tools and resources, while e-Learning in Malaysia will ZOOM in on e-learning adventures going on in Malaysia.
Friday, February 27, 2015
Top Educators in Malaysia on Twitter!

PASSION TO TRANSFORM?
HOW TO JOIN?
- Click Add to List
Listly login required. Account created using Facebook, Twitter, LinkedIn or Google+ login. - Add your Twitter ID URL
Click Enter link, add URL and then Click Go!. It will then automatically add your picture and Twitter data, which you can update again if needed. - Add a Brief Profile
What you do, where you work and URLs to your website/blog or other social media stuff that you want to share. - Add Your Level and Location
Level(s) = University, College, Polytechnic, School, Corporate (could be more than one)
Location = Selangor, Kuala Lumpur, Penang, etc. The state in where you work or located most of the time (could be more than one). - Click Save
IMPORTANT NOTICE
WHY TWITTER?
FACEBOOK?

THE MALAYSIAN SUPER HEROES IN EDUCATION
Lets connect, network and unite forces to transform Malaysian education in all possible areas, and empower locals and the world to experience engaging and inspiring learning with a Malaysian flavor too delicious to resist :)
The Secret Get 100 000 Followers On Twitter In 24 Hours!

...more
THE SECRET
However, if you are following 1 million and have 100,000 followers, others with a bit of knowledge would think of you as a wannabe twitter king. So, then learning the game, you will eventually remove those 900,000 that did not follow you. Now it looks better, right! 100,000 Followers versus 100,000 Following. But then you get smarter, and remove 50,000 (or why not 90,000) of those you are following, and trust me they will have no idea, because who keeps track of these kind of things. And swoosh you have 100,000 followers, but you are only following say 10,000 now (Do no Evil!). Now that looks really impressive! Now, you are crowned a Twitter King! Actually, 100.000 followers is not much, so the next step would be to get 1,000.000 million followers. You repeat the 24-hour cycle again and again and again...
Wait a second! Where am I going to find one million people to follow on Twitter. Ashton Kutcher to the rescue! Currently, he has 2 million plus followers (as I write). So, if you speed off to click 2 million times (excluding clicking the Next buttons!), you should expect 200,000 followers within a 24-hour period. Even if you have to wait 2-3 days, I think you will survive. Next, you might go for Oprah (although she is only no. 7 on the top 100 Twitter Counter list), as you might find many new Twitter faces there who are not following Ashton Kutcher.
Wait a minute! How am I going to be able to click 2 million times within a 24-hour period? You need a good broadband connection for sure, and some Bruce Lee kind of chopping skills.
What if I told you that you only need to click a special MAGIC BUTTON once to follow all Ashton Kutchers followers, or any other person on Twitter you choose. Believe or not, the mastermind (will never reveal who!) behind this tool, is currently working on the ultimate magic button that will enable anyone to click once to follow every single soul on Twitter. Imagine following lets say 10 million people with one click.
Wait an hour! Cool, but how do I remove those people who eventually dont follow me, so that I dont look like a Twitter Twit! Well, what if I told you that there is a MAGIC REMOVE BUTTON that filters and removes all those people who are not following you, and has an amazing fuzzy semantic logic that can also strategically using a cosmetic target marketing feature to remove a certain specified number of your followers (to your own liking), so that you can really look like a Twitter King.
This mastermind (that I am not going reveal! Dont think of asking! I keep my word!) is in the early stages of conceptualizing a MAGIC GHOST BUTTON that will add you followers without them even knowing it. It is really smart, because it only targets people that follow more than a thousand Twitter users, making it difficult to track its ghost clicking activity.
I am ready! But, why dont you have more than +600 followers? Well, some people dont practice what they preach. I only target educators that I want to connect with (Following a 1,000+) and perhaps learn something from them...
What! You got to be kidding! I need to remove this dude as fast as possible from my list!
Finally, when you embark on your important mission to get 100,000+ followers (Too small, think millions! Think bigger than big!), remember to do it fast! If you are interested in using the magic buttons I have mentioned, please contact me... which of course cannot be revealed here. Please meet me on the MOON as soon as possible. Further directions will be given when you reach the moon.
But then again, who cares about the number of followers you have! What really matters is the number of RETWEETS you have (Topsy will tell you!), and how many times they are being clicked, and so on. Also,... (some other time). Pay me well, and I will reveal :)

Wednesday, February 18, 2015
Free Real Estate Business Cards in Ai Format

Free Download Real Estate Business Cards. ideal for real estate or building construction companies. Enjoy!
Type : Ai
Category : Cards
License : Free
Author : Businesscardszone
Tuesday, February 17, 2015
HowTo sort nautilus icons in fedora 18


Step 1:
open terminal
Step 2:
type this on the terminal
gsettings set org.gnome.nautilus.preferences sort-directories-first true
Sunday, February 15, 2015
C program to do linear search in Array

#include<iostream.h>
#include<conio.h>
void main()
{
clrscr();
int a[20],n,x,i,flag=0;
cout<<"How many Elements?";
cin>>n;
cout<<"
Enter Elements of the Array
";
for(i=0;i<n;++i)
cin>>a[i];
cout<<"
Enter Element to search:";
cin>>x;
for(i=0;i<n;++i)
{
if(a[i]==x)
{
flag=1;
break;
}
}
if(flag)
cout<<"
Element is Found at position "<<i+1;
else
cout<<"
Element not found";
getch();
}
Saturday, February 14, 2015
Human Sixth Sense in IT terms
HowTo Install Java Plugins in Google Chrome Firefox in Fedora 18
download Linux x64 RPM in http://www.java.com/en/download/manual.jsp?locale=en
Step 2:
open terminal and type the following
su -
cd /home/**username**/Downloads (replace **username** with yours)
rpm -ivh jre-7u11-linux-x64.rpm
you will see some few errors but its ok
Step 3:
Monday, February 2, 2015
How to Create a Quiz in Flash ActionScript 3 Tutorial PART 2
In the first part of this lesson, we added the functionality that will allow the user to take the quiz - we added the questions and the correct answers, and we enabled the user to submit his or her own answers by using the input field and clicking on the submit button. All of that happens in frame 1 of our simple Flash quiz.
In this part of the How to Create a Quiz in Flash using ActionScript 3 tutorial, we will be working on the following:
- Displaying the users answers alongside the correct answers
- Checking the users answers and computing the score
- Displaying the users score
TextFields for the USERs answers - userAnswer0_txt, userAnswer1_txt, userAnswer2_txt, userAnswer3_txt
TextFields for the CORRECT answers - correctAnswer0_txt, correctAnswer1_txt, correctAnswer2_txt, correctAnswer3_txt
TextField for the SCORE - score_txt
The TextField names for the answers have numbers in them so that they will match the index values of the answers in the arrays (aUserAnswers and aCorrectAnswers). userAnswer0_txt will be for aUserAnswers[0], userAnswer1_text will be for aUserAnswers[1], and so on...
So now lets go ahead and add the code. Make sure you select frame 2 of Actions layer and then go to the Actions Panel. Lets first create a number variable:
var nScore:Number = 0;This variable is going to be used to store the users score. Im initializing it to 0 just in case the user does not get any answer correctly. If that happens then the score will just stay at 0. Ok, so well go back to that variable later. For now, lets work on the code that will display the answers in their respective text fields. We will get the data from the arrays using array access notation, and assign each piece of data to its corresponding text field using the text property of the TextField class. We can do it this way:
userAnswer0_txt.text = aUserAnswers[0];If you add in this code and then test the movie, you should see all the answers displayed in the text fields after you answer all the questions. So at this point, we can actually move on to the next part of the code that will check whether the answers the user gave are correct. But before we do that, Id like to show you another way of displaying the answers in the TextFields. Instead of manually assigning each item to its corresponding text field one by one, well use a for loop instead. So go ahead and remove or comment out the code above, and well try this other method of displaying the answers.
userAnswer1_txt.text = aUserAnswers[1];
userAnswer2_txt.text = aUserAnswers[2];
userAnswer3_txt.text = aUserAnswers[3];
correctAnswer0_txt.text = aCorrectAnswers[0];
correctAnswer1_txt.text = aCorrectAnswers[1];
correctAnswer2_txt.text = aCorrectAnswers[2];
correctAnswer3_txt.text = aCorrectAnswers[3];
Ok, so in the first method, we displayed the answers this way:
textField.text = array[index];
ex.
correctAnswer0_txt.text = aCorrectAnswers[0];
For this other method that were doing, we need to learn another way of targeting our TextField. For example, instead of typing in correctAnswer0_txt.text, we can replace correctAnswer0_txt with this["correctAnswer0_txt"] instead. So this is what well have:
this["correctAnswer0_txt"].text = aCorrectAnswers[0];
This is but another way of targeting our display objects (like Buttons, MovieClips and TextFields). Lets take a look at the example again:
this["correctAnswer0_txt"]
Here, since our code is placed in the main timeline, then the this keyword in this instance would refer to the main timeline. And then inside the square brackets, we place the name of the child object that we want to target (the name must be specified as a string, so it should be in quotation marks). So what were doing here is we are telling Flash to target the correctAnswer0_txt TextField which can be found inside this (which in this example would be the main timeline).
So what is the benefit of writing it this way instead?
In this other method of targeting display objects, we are specifying the name of the instances as strings. Because were doing it this way, we can replace the numbers in the names with variables instead. That way, we can just have that variable be incremented inside a for loop so that we dont have to hard code in the numbers for each text field (here you see why its important that we numbered our text fields within their respective names). If this sounds a bit confusing, lets take a look at how the new text assignment statement will look inside of the for loop:
this["correctAnswer" + i + "_txt"].text = aCorrectAnswers[i];
Here, the numbers are replaced with the variable i. For the text fields name, the join operator (+) is used to combine the variable with the rest of the name. Then as the for loop updates, so does i, therefore allowing us to iterate through the text fields and the items in the arrays. Note that i is a number, and it is being combined with strings. In this example, there is no need to convert i into a string. Because the number data is being combined with strings, Flash will automatically convert that number data into a string. So now lets go ahead and write our for loop. Well start with the variable i being equal to 0, and then as long as i is less then aQuestions.length, well keep the for loop running (you can also use aCorrectAnswers.length or aUserAnswers.length since they all have the same lengths anyway). So our for loop will look like this:
for(var i:Number = 0; i < aQuestions.length; i++)
{
     this["userAnswer" + i + "_txt"].text = aUserAnswers[i];
     this["correctAnswer" + i + "_txt"].text = aCorrectAnswers[i];
}Go ahead and test your movie and you should see that this will yield the same results as with the previous method that we used. This second method would be more efficient to use since we wont have to type in the text assignment statements one by one. Imagine if our quiz had 100 questions!
Ok, so now we can move on to the part that checks whether the users answers are correct. So how do we write the code that will determine whether each answer is correct or not? If the answer that the user submitted is the same as the corresponding item in the aCorrectAnswers array, then it means that the user got the correct answer. We know that the users answers are stored in the aUserAnswers array so we could just compare if the items in aUserAnswers match their partners (the ones with the same index value) in the aCorrectAnswers array. Well use an if statement for that. For each match that is detected, we will give the user a point by incrementing nScore by 1 (nScore is that variable that we created earlier, which was initialized to 0). We will place that if statement in the for loop as well, since we want to go through each item in both of the arrays. So our updated for loop is now:
for(var i:Number = 0; i < aQuestions.length; i++)
{
     this["userAnswer" + i + "_txt"].text = aUserAnswers[i];
     this["correctAnswer" + i + "_txt"].text = aCorrectAnswers[i];
     if(aUserAnswers[i] == aCorrectAnswers[i])
     {
          nScore++;
          trace(nScore);
     }
}for(var i:Number = 0; i < aQuestions.length; i++)
{
this["userAnswer" + i + "_txt"].text = aUserAnswers[i];
this["correctAnswer" + i + "_txt"].text = aCorrectAnswers[i];
if(aUserAnswers[i].toUpperCase() == aCorrectAnswers[i].toUpperCase())
{
nScore++;
trace(nScore);
}
}So now, if you test the movie and try out the quiz again, you should see nScore update in the output window (provided that you get at least one answer right, if you dont get any answers right, then nScore never gets updated and wont get traced).
Lastly, wed like to display the final score in the score_txt text field. Well display the score once the for loop has finished checking all the answers. To check whether the for loop is finished, we can check whether i is equal to aQuestions.length - 1. If i is equal to the array length minus one, then it means that the for loop is already at the last item (we subtract the length by 1 because the index values start at 0, where as the length count starts at 1). So well use another if statement inside the for loop to check for that. If i is equal to aQuestions.length - 1, then we assign nScore to score_txt using the text property of the TextField class (be sure to convert nScore to a string using the toString() method). So lets go ahead and update the code:
for(var i:Number = 0; i < aQuestions.length; i++)
{
     this["userAnswer" + i + "_txt"].text = aUserAnswers[i];
     this["correctAnswer" + i + "_txt"].text = aCorrectAnswers[i];
     if(aUserAnswers[i].toUpperCase() == aCorrectAnswers[i].toUpperCase())
     {
          nScore++;
     }
     if(i == aQuestions.length - 1)
     {
          score_txt.text = nScore.toString();
     }
}Here is the code in full:
FRAME 1
stop();

var nQNumber:Number = 0;
var aQuestions:Array = new Array();
var aCorrectAnswers:Array = new Array("Jupiter", "Mars", "war", "Titan");
var aUserAnswers:Array = new Array();

aQuestions[0] = "What is the biggest planet in our solar system?";
aQuestions[1] = "Which planet in our solar system is the 4th planet from the sun?";
aQuestions[2] = "Mars is named after the Roman god of ___.";
aQuestions[3] = "What is the name of Saturns largest moon?";

questions_txt.text = aQuestions[nQNumber];

submit_btn.addEventListener(MouseEvent.CLICK, quiz);

function quiz(e:MouseEvent):void
{
     aUserAnswers.push(answers_txt.text);
     answers_txt.text = "";
     nQNumber++;
     if(nQNumber < aQuestions.length)
     {
          questions_txt.text = aQuestions[nQNumber];
     }
     else
     {
          nextFrame();
     }
}var nScore:Number = 0;
for(var i:Number = 0; i < aQuestions.length; i++)
{
this["userAnswer" + i + "_txt"].text = aUserAnswers[i];
this["correctAnswer" + i + "_txt"].text = aCorrectAnswers[i];
if(aUserAnswers[i].toUpperCase() == aCorrectAnswers[i].toUpperCase())
{
nScore++;
}
if(i == aQuestions.length - 1)
{
score_txt.text = nScore.toString();
}
}Sunday, January 25, 2015
Seven Languages in Seven Weeks Ruby Day 2
Ruby, Day 2: Thoughts
I originally learned Ruby (and many other programming languages) the "hacker way": that is, I did a 10 minute syntax tutorial, browsed other peoples code a bit, and then just started using the language, looking up missing pieces as I went. Although this is the most fun and productive way Ive found to get started with a language, it can also lead to missing some of the finer points and subtleties.
For example, until the "Ruby, Day 2" chapter, I never had a full appreciation for Ruby code blocks and the yield keyword. For example, even though I frequently used "times" to do looping, I never thought deeply about how it worked:
It turns out that times is just a function (slightly obscured because Ruby doesnt require parentheses for function calls) on the Integer class that takes a code block as an argument. Times could be implemented as follows:
This style of coding allows for some powerful possibilities. For example, it is surprisingly easy to introduce a "do in a transaction" function:
Using this, I can now trivially wrap any number of statements in a transaction:
The equivalent in less expressive languages, such as Java, often involves vastly more code, implementing arbitrary interfaces, anonymous inner classes, and a lot of very hard-to-read code. For comparison, here is an example of how Javas Spring Framework recommends wrapping JDBC code in transactions:
Ruby, Day 2: Problems
The Day 2 problems are only slightly tougher than Day 1. The most fun part was coming up with a way to keep the code as concise as possible.
Print 16
Print the contents of an Array of 16 numbers, 4 numbers at a time, using just "each". Now, do the same with "each_slice" in Enumerable.
Tree
Modify the Tree class initializer (original code here) so it can accept a nested structure of Hashes. Trickiest part here was that the "collect" function can call the passed in block with either one argument thats an Array or two arguments that represent the (key, value) pair.
Grep
Write a simple grep that will print the lines and line numbers of a file having any occurrence of a phrase anywhere in that line.
Ruby vs. Java, Round 2
I couldnt resist implementing the grep code in Java to see how it compares:
Its 33 lines long. The Ruby solution was a one-liner.
Ruby, Continued
Check out more Ruby goodness on Ruby, Day 3.
Saturday, January 24, 2015
Making of 8 passport size photos in single maxi
About Photoshop


Step by Step Procedure :
1) First of all take a nice photo and open it with photoshop or go to file click on the open and browse your image.
2) Press ctrl+c (means crop) and give size 1.35 inch width and 1.75 inch height, resolution should be 300 pixels/inch.
3) Select the image crop the image now your passport size image is ready.

Wednesday, January 21, 2015
Complete Ms Office Word 2007 Video Tutorials in Urdu and Hindi

Ms Office Word 2007
Note: All videos are hosted on YouTube.com, so if you are in Pakistan then first open YouTube and then watch these videos